

While it seems that mounting a scope should be easy, if you miss a few steps, it can become a nightmare.
Even though mounting also takes on a different perspective depending on whether we’re hunting, plinking, or competing, they all start the same way.
Steps on How to Mount a Scope
Whether it’s learning how to mount a scope on an AR15 or a Ruger, the core steps are the same. Each one impacts how well the scope sits on our rifle.
1. Check the Threads
Riflescope mounts depend on the screw threads to be clean and in good shape. If they’re not clean and instead covered in oil, residue, or anything else that could keep the scope from mounting, it’s a problem waiting to happen.
If you notice the threads aren’t clean, it’s best to clean them with a microfiber cloth to get rid of the debris. Clean the threads thoroughly so the screws will fit properly.
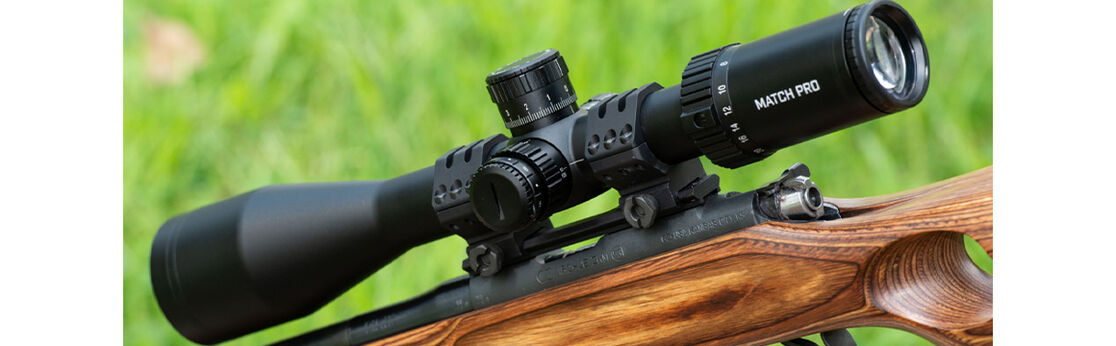
2. Mount the Rings
After the threads have been checked, it’s time to mount the rings. The rings must be done precisely when preparing to mount a scope or sight.
Having an eye for alignment is crucial in getting this step correct. If you aren’t sure about your capabilities, there are scope mounting kits available to be confident that the rings are perfectly lined up.
3. Proper Torque is Crucial
Depending on the rings, scope, or sight that we’re installing, the torque can change. For the mount to be secure, it has to be tight enough that it won’t move as a result of the recoil.
Torque ranges from 15 inches per pound upwards of over 65 inches per pound necessary to stabilize a scope or a sight. The best thing is to check with the manufacturer to ensure we have the right amount of torque not only to hold the scope but to also keep it from getting damaged.
4. Don’t Forget Adjusting Scopes for Eye Relief
When we forget to adjust for eye relief, we risk getting smacked in the face by the scope upon shooting.
Eye relief is simply the distance from our eyes to the preferred field of view or FOV. We want to make sure that our eyes are a safe distance from the edge of the scope without compromising FOV, so finding the right adjustment takes time and practice.
The Consequences of Improper Mounting
When it comes to learning how to mount a rifle scope, there are potential dangers both to you and your equipment if it isn’t installed correctly.
For one, if the threads aren’t clean, we could face stripping the screws or at least wearing down the threads prematurely. Should that happen, even if the scope seems secure, one good recoil could loosen the entire scope assembly.
If it gets loose, then we’re looking at damaged equipment like the lenses, the various dials, and the mounting assembly.
The same could be said for not precisely mounting the scope. A scope that is off-center of the rifle can cause improper shooting leading to potential injury since our shots wouldn’t go in the right direction.
When it comes to torque, if it’s not tight enough, the entire thing could fly off and hit you in the face, potentially causing significant injury.
Extra Steps When Issues Arise
Occasionally, we use rifles that may have belonged to other people and come across issues like cross-threading. Cross-threading happens when other people are not familiar with how to properly mount a scope.
Other issues like over-tightened screws or using the wrong adhesive can occur, too. When we see it, some extra steps need to be taken to make the receiver threads usable again.
Removing problem screws or rings is best left up to a gunsmith. Without proper training or knowledge, it’s incredibly easy to ruin the firearm. When in doubt, seek out a pro.
Different Types of Scopes
We always come across the question of which scope is best to use, especially when it comes to AR15 scope mounts or AK47 scope mounts.
The reality is that the best questions to ask are what are we using the rifle for, and how much can we afford?
Red Dot Sights
Red dot sights, also known as reflex or reflector sights, have been around for decades. When mounting a red dot sight, there’s a dot that is either red or green. Its position is directly above the iron sights at the front of the gun. There is not much in the way of extra alignment once it is lined up with the irons.
If you’re competing in short-range or mid-range competitions, then a red dot sight is an excellent choice, especially for shooters new to the sport. Red dot sights are well-rounded sights that are also wonderful for hunting and plinking.
Hunting Scopes
Hunting tends to require scopes that aren’t necessarily long-range. Consider deer hunting as an example. The scope we use must be sturdy and able to take a more substantial recoil.
Scopes for hunting must also be able to handle the elements outdoors. We like options like Bushnell’s Prime 3-9x40 Illuminated and 3-12x40 Multi-Turret riflescopes. Not only do they have the standard EXO coating that lets water bead right off, but are also designed with precision in mind.
Competition Long Range Scopes
Mounting a long-range competition scope isn’t any different from any other mounting, but not being precise at a short-range will affect long-range efforts. If the alignment isn’t perfect, being off by one degree can mean a full five-inch difference at 1,000 yards.
There are tools and techniques available to ensure our scopes are spot on. Three-shot groups are a fantastic way to check errors and grouping to get long-range riflescopes set to compete.
Some of our favorite choices for long-range scopes, like the Elite Tactical DMRII Pro Riflescope, include lenses that are designed to bring out the colors and details even at a distance. The Forge line of riflescopes is also full of excellent choices for the competitive shooter or long-range hunter.
A Final Tidbit on Mounting an Offset Sight for Competition
Offset sights are typical iron sights that are set at a 45-degree angle to the bore to keep from interfering with the primary optical sight. They work like standard irons, but they require us to tilt our rifle to shoot.
Some shooters like the feel of these as AR scope mounts and feel like they get a better shot with this technique. Offset sights can be fantastic for short-range competitive shooting because it gets the main optics out of the way of the shot. They’re something to consider if you’re into short-range competitions.
Knowing which type of scope or sight we need helps when it comes to competitive shooting, but it won’t help much if we don’t mount them properly. It’s best if we can get it right the first time.
If you want more information on choosing the right scope, take a look at our blogs for more great tips!